The Categories allow survey creators to define categories like location, preference, or role when setting up a survey. Upon completion of the survey, the feature allows for the aggregation of data not just as a whole but segmented according to these categories. This means that survey creators can filter the results based on these categories to analyze how different groups of respondents answered the survey. This article will demonstrate the process of creating and managing Categories.
Reports
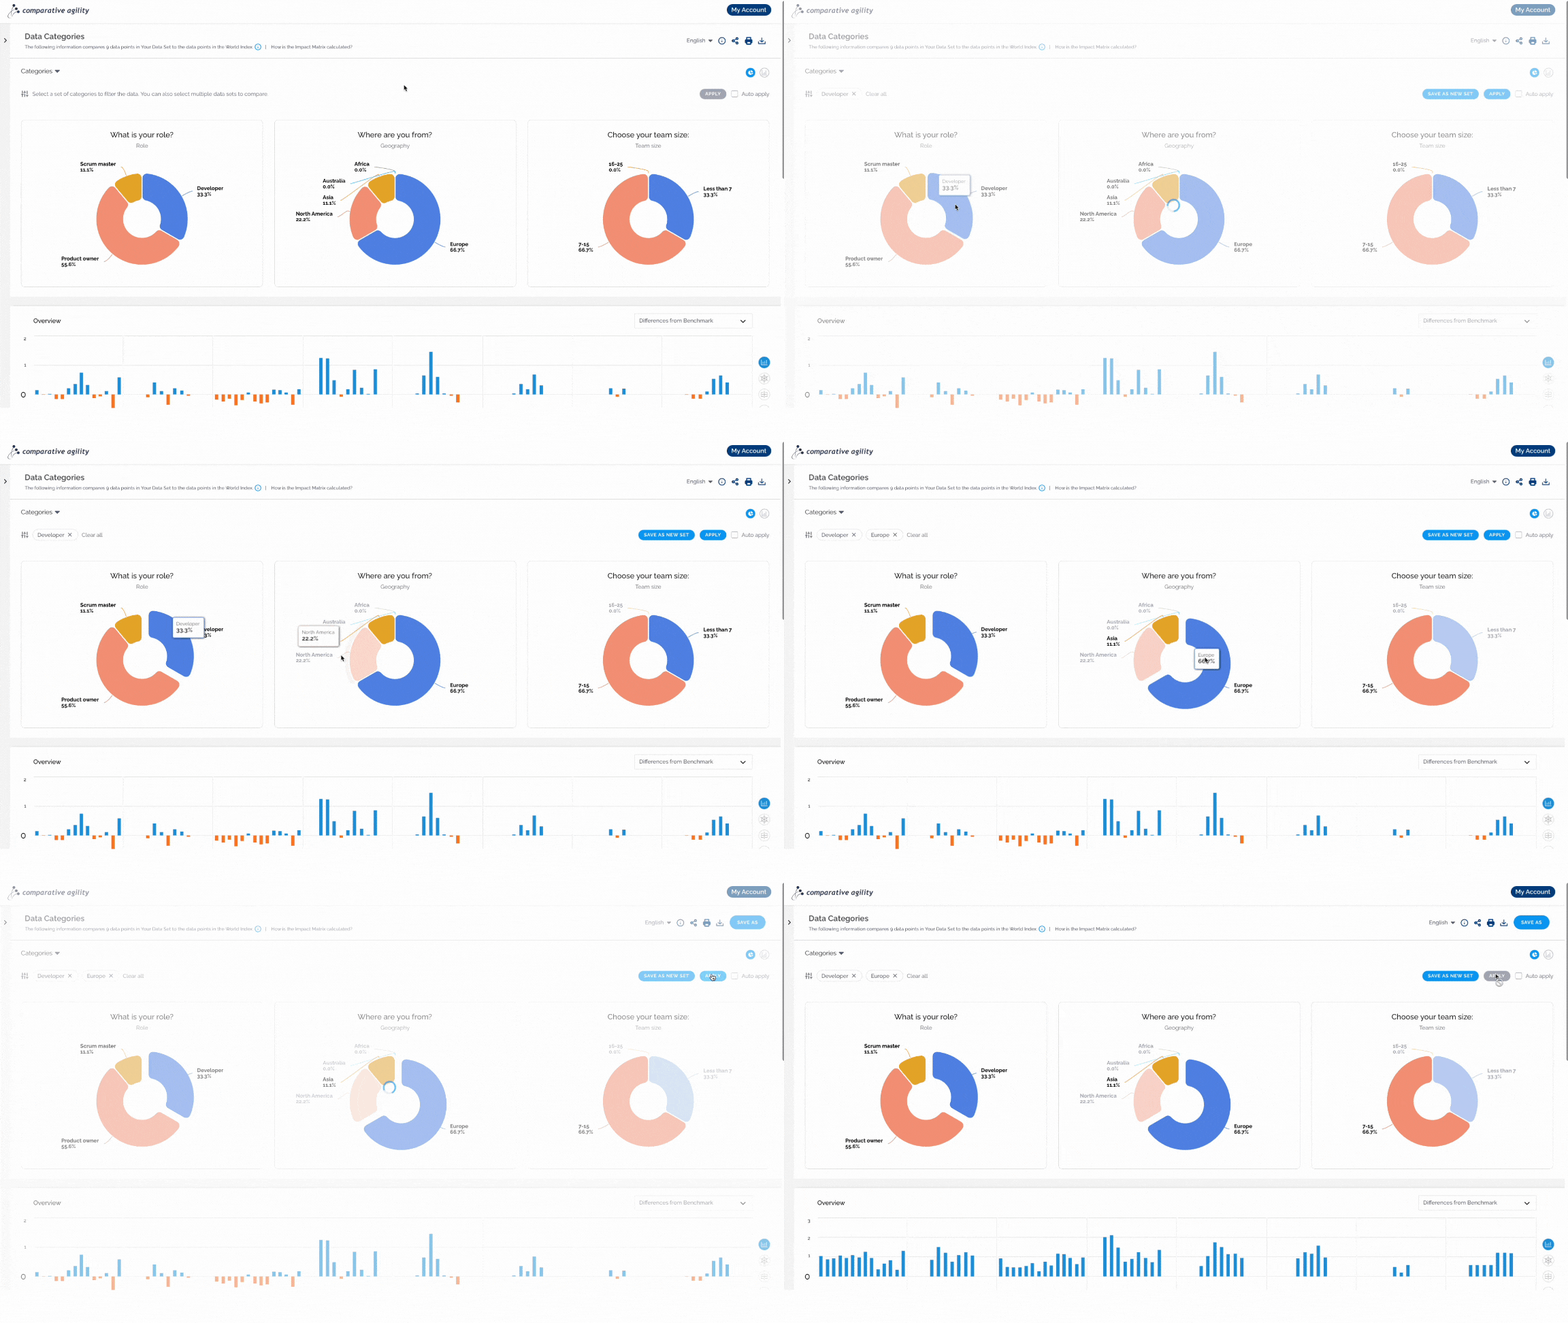
The reports will show categories where you can further filter the data and create new reports. You can choose between various report types, based on your needs and preferences. Simply:
- Create a new report on the Analysis Screen
- Select a set of categories to filter the data
- Click on the Apply button
In the short video below we show how to select a set of categories

To learn more about creating reports, please visit our Help Center article Analysis screen.
Comparing Data Categories in Reports
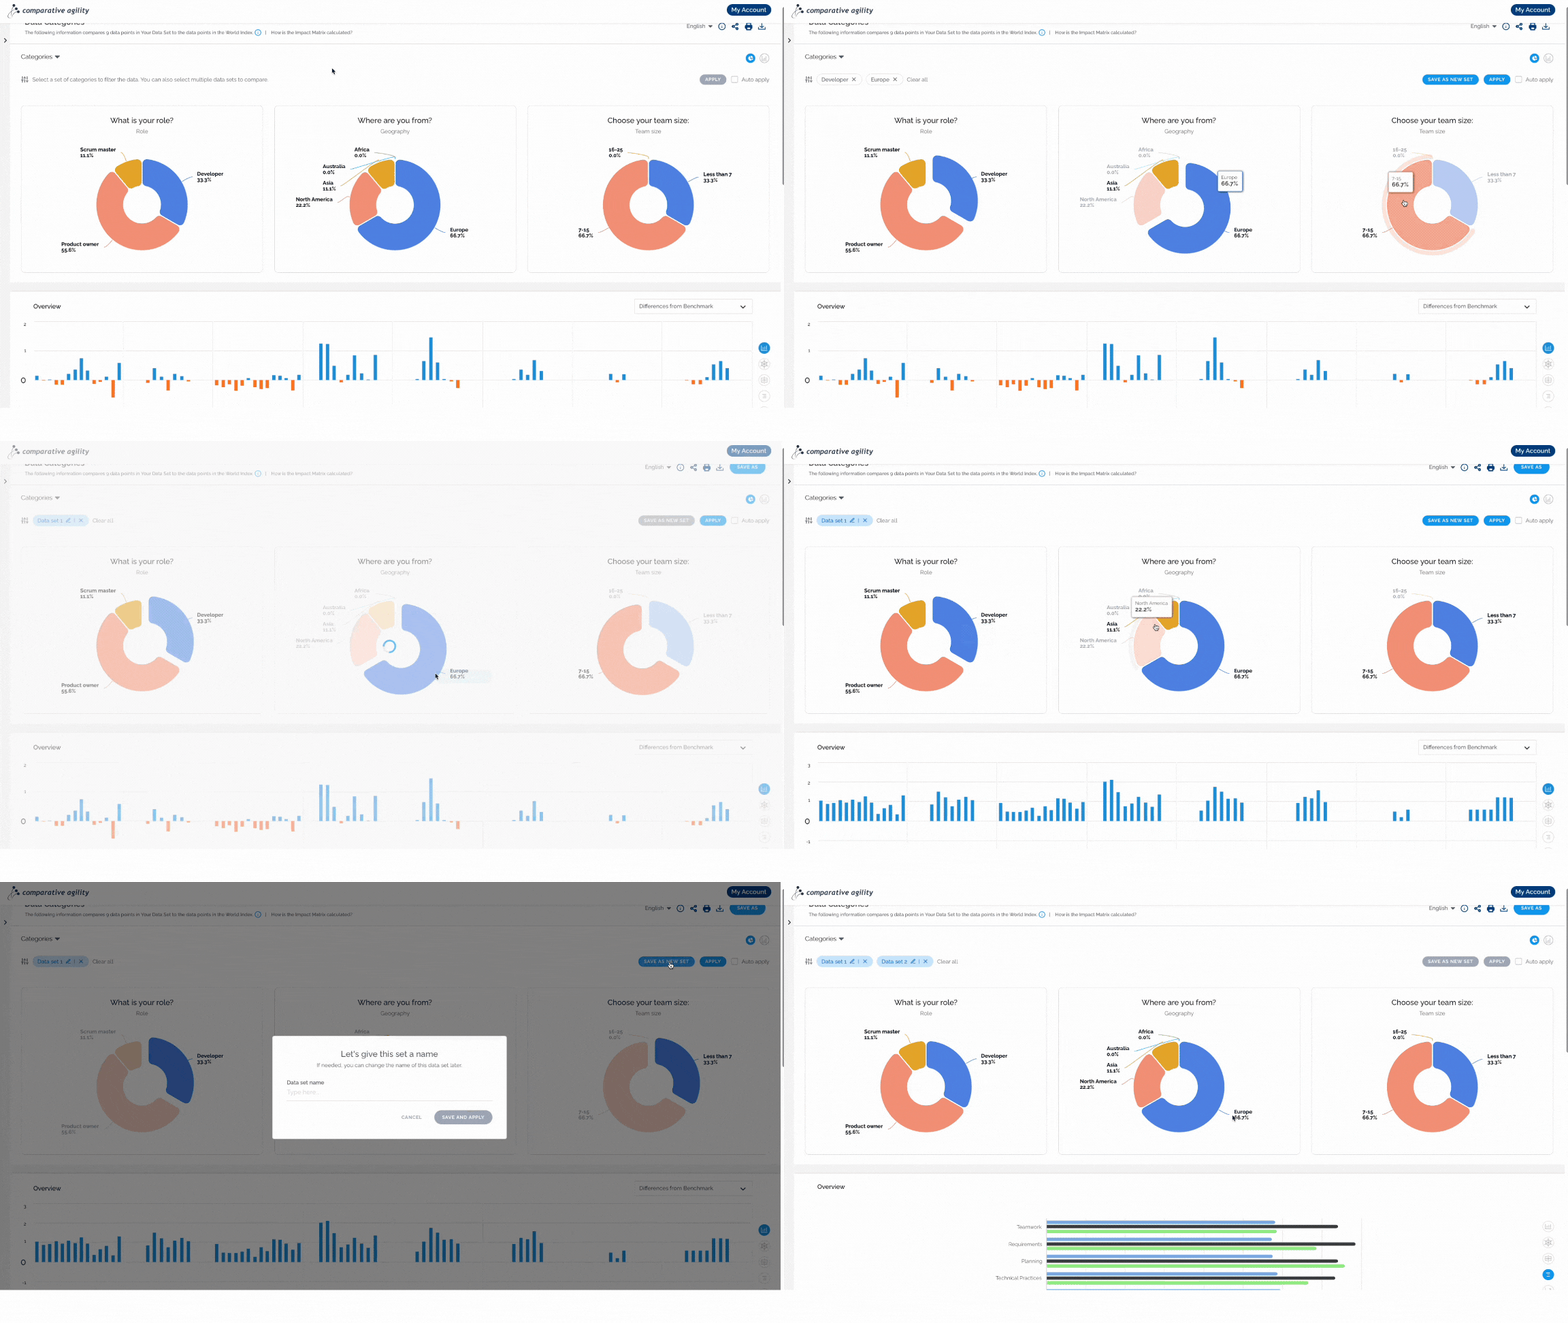
We’ve introduced a new feature that allows users to compare data categories across up to three different data sets. With this feature, users can select specific data categories for each data set in their report. This can be particularly useful for comparing how individuals or groups in these different data sets are performing in relation to the selected categories, enabling side-by-side comparisons and deeper insights.
To add data sets, follow the steps below:
- Choose categories for the first set
- Click on the Save as New Set button
- Proceed with selecting other categories
- Save it as a new set
- Repeat the process to add one more if necessary
The short video below shows you how to compare data categories in reports

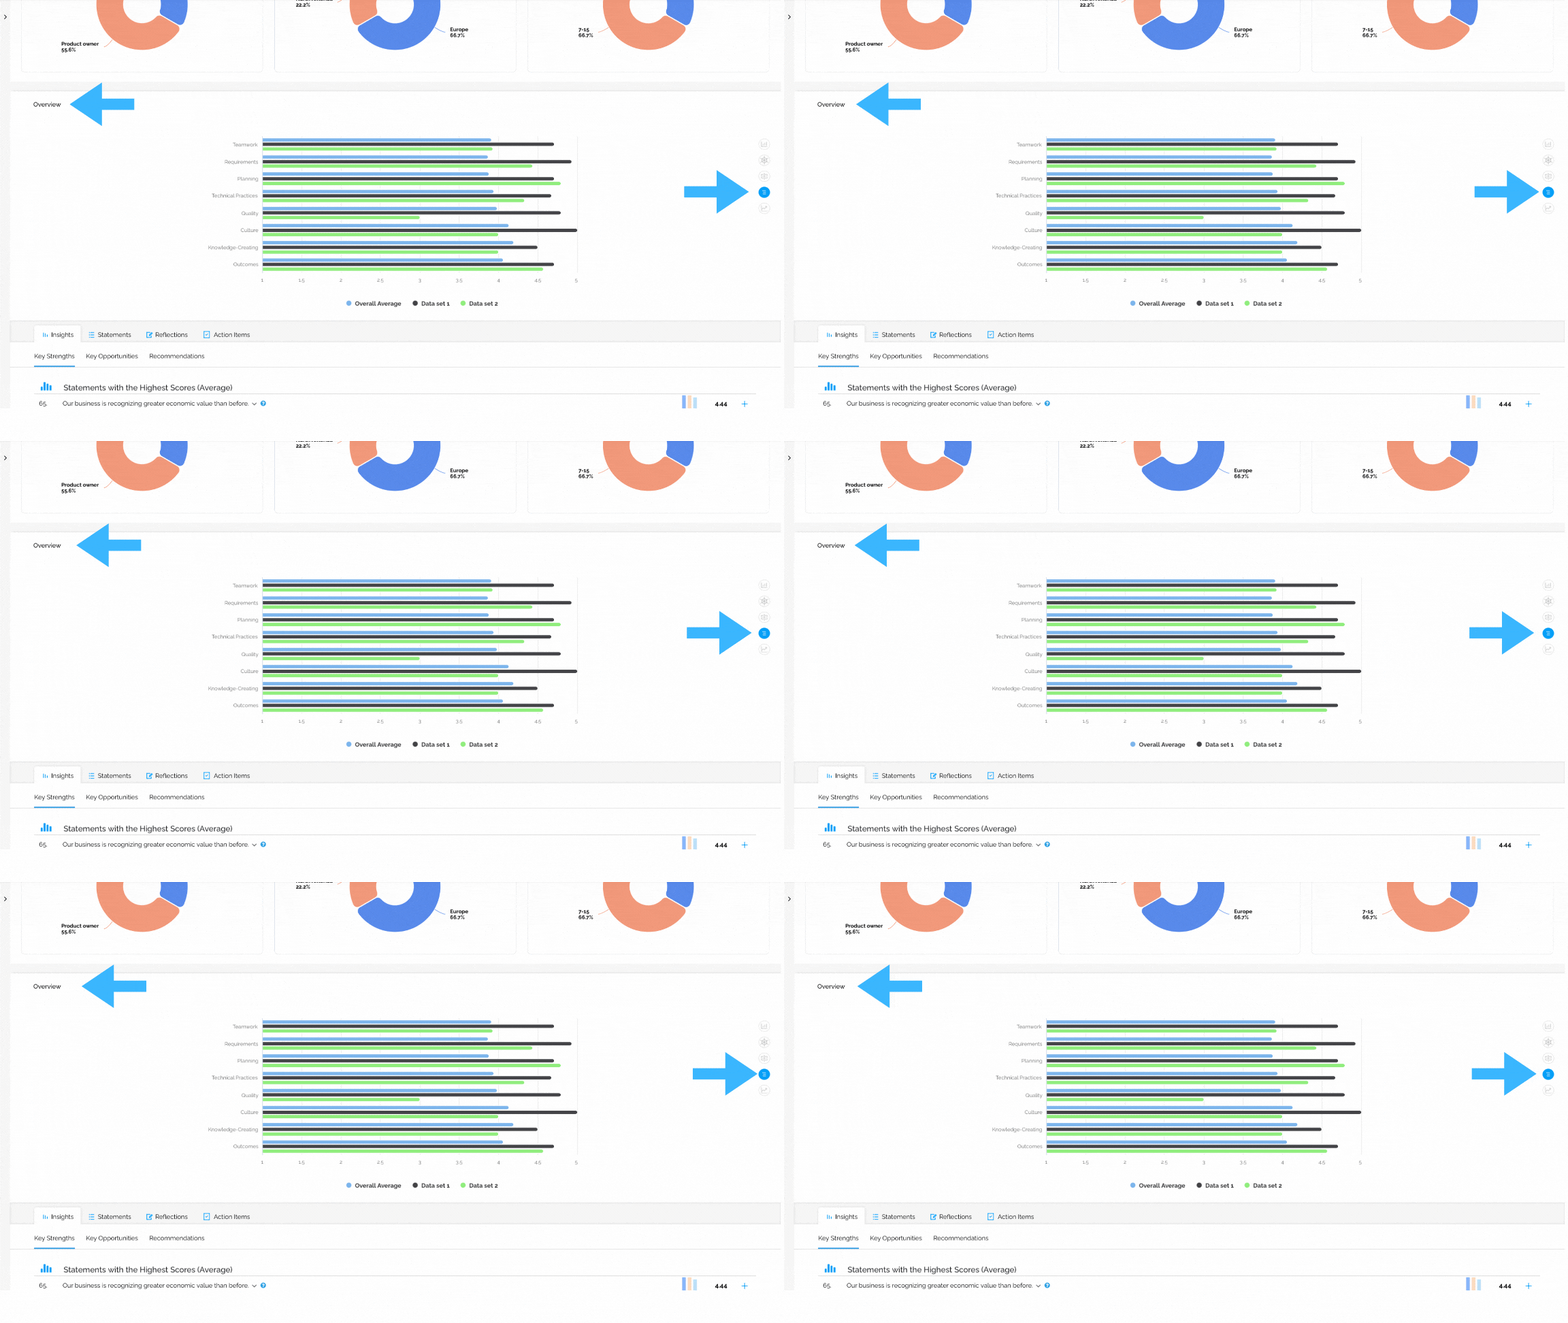
Once you choose multiple data sets, you will be able to compare the data sets in the Overview section.
In the screenshot below we show you how the comparison section looks like

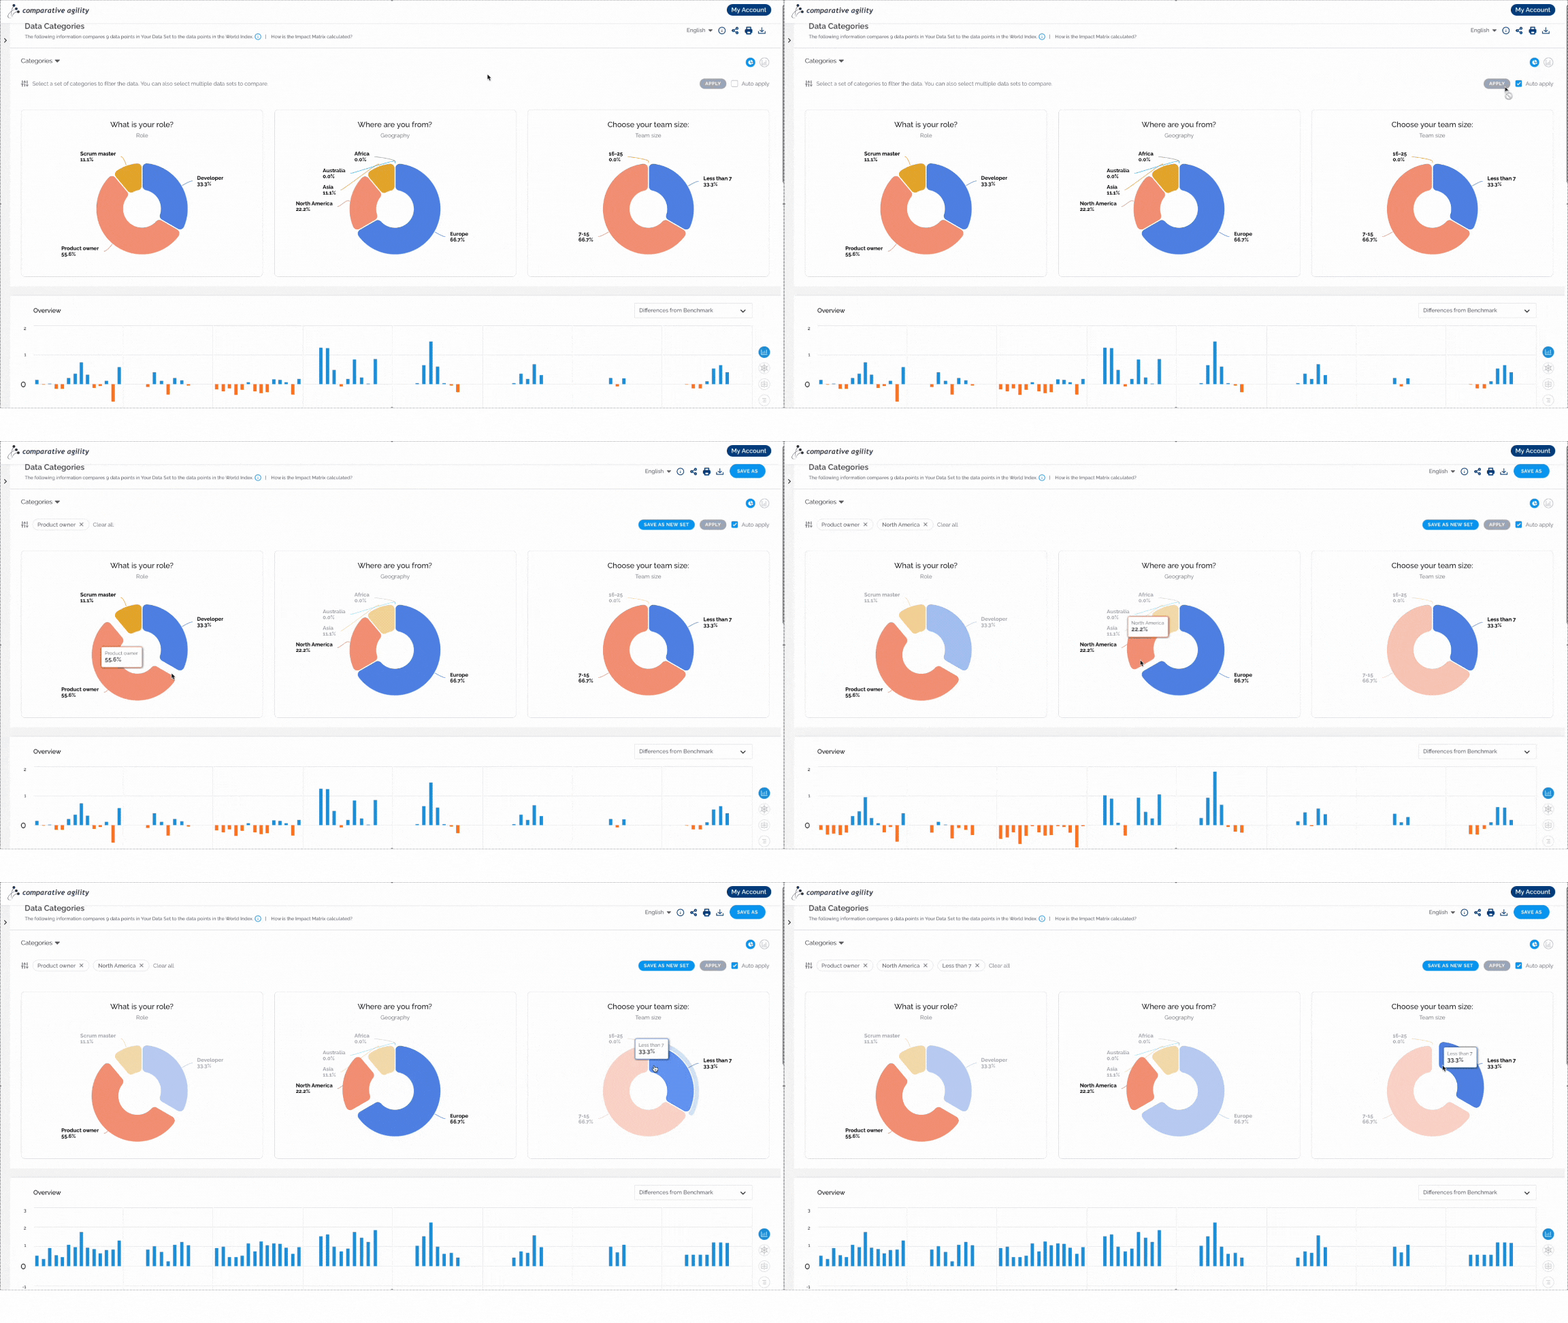
Auto Apply
With this option, your data will be automatically calculated per selection, without the need to use the Apply button.
- Select the Auto Apply option
- Proceed with selecting the data categories
The short video below shows you how to use the Auto Apply option

Note: Please, keep in mind that this might affect report performance time.
To learn more about creating Data Categories, please visit our Help Center article Creating and Managing Data Categories.
If you ever need any assistance or have any questions please reach out to our support team at support@comparativeagility.com and we will be more than happy to assist you.
